Table of Contents
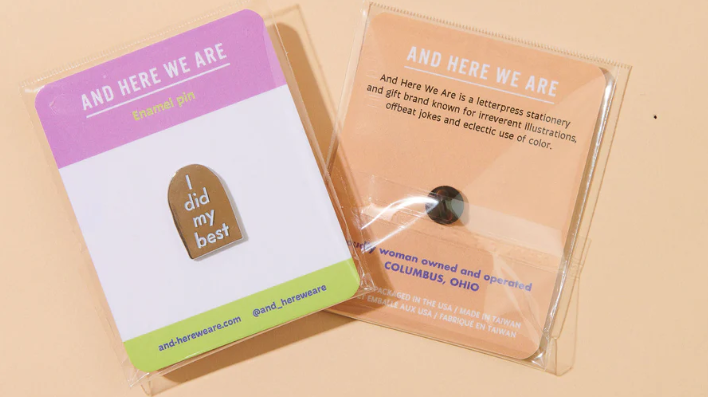
What is an enamel pin?
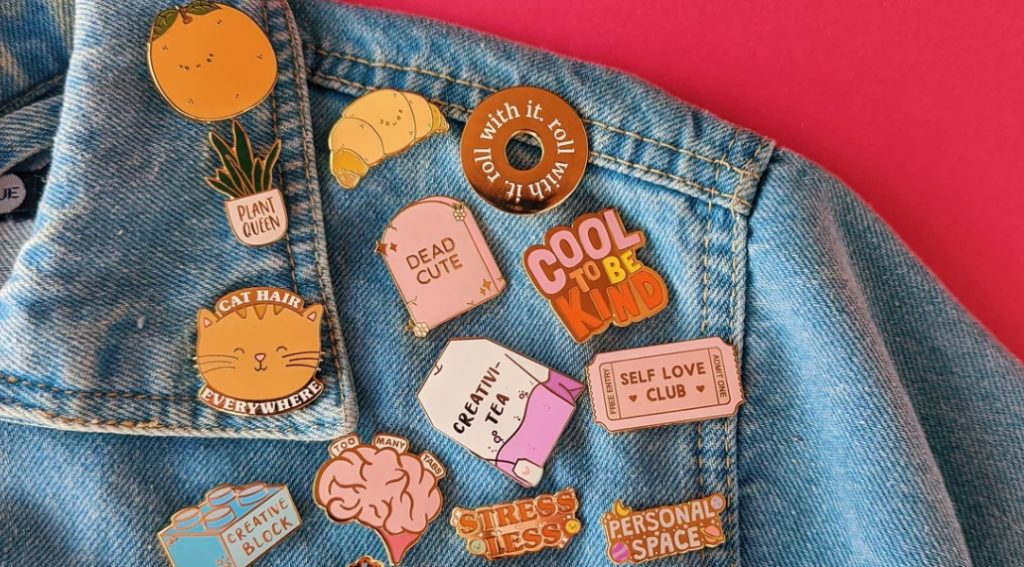
Enamel pin, also called lapel pin, is a small pin usually used to pin on clothes or bags. It has the function of decorating clothes, showing personality or indicating identity. Enamel pins are considered to be the highest quality lapel pins available, and for a pin artist who wants to create lapel pins of their own design, enamel pins are their first choice. In this article, I will explain to you step by step how to make a lapel pin of your own design. From the design artwork to the factory production process, you only need this guide.
Types of Enamel Pins
- Custom Soft enamel pins
- Custom Hard enamel pins
- Custom Printed pins
- Die-struck Lapel pins
- 3D Cast Lapel pins
- Laser Etched pins
Prepping to Make Your Enamel Pins
What should I consider when budgeting for a custom enamel pin project?
- The complexity of your design;
- The size of pins;
- The number of colors in your enamel pins;
- The quantity of enamel pins;
- Backing types or additional features.
Create Your Design
Before you begin, you’ll need to prepare a design for your lapel pin. There are a few things to keep in mind when designing your pin:
- Keep your design simple and clear. Complex designs will be more expensive and difficult to produce.
- Decide on the size of your pin. Larger pins are easier to produce, so if you’re making a small pin, you’ll need to keep your design relatively simple.
- Clearly specify any additional requirements in your design drawing to avoid misunderstandings. To ensure color accuracy, use the Pantone color system and choose 6-8 solid colors, as most manufacturers use this system.
If you just have an idea and don’t know how to turn your idea into a professional design manuscript, you can consult us. We provide free design services. Just tell us your ideas and we can make them a reality.
Choose the Type of Pin
When making enamel pins, custom hard enamel and custom soft enamel are the two most popular choices.
Custom Hard Enamel Pins
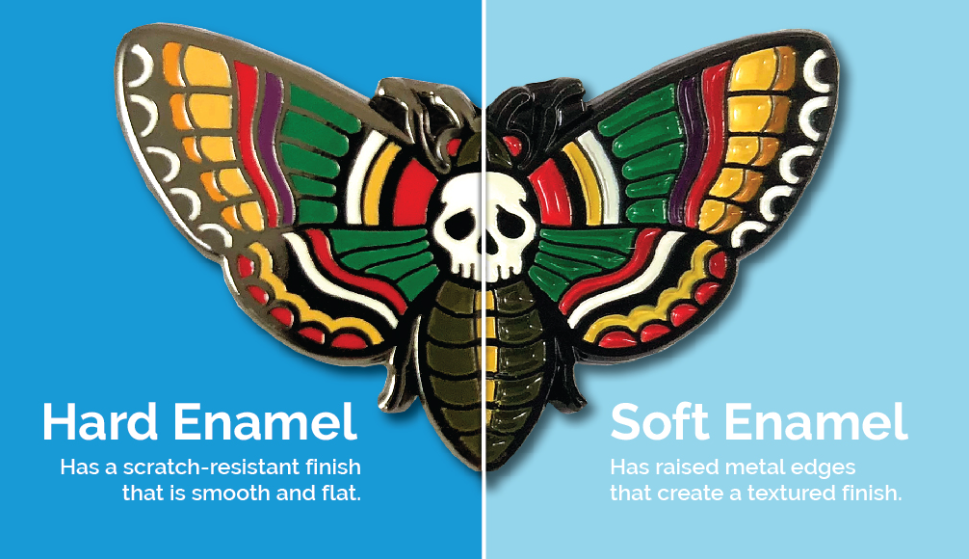
Custom hard enamel pins are made by adding enamel to the pin before electroplating, and then polishing it multiple times. After the surface is polished, the color blocks are flush with the metal lines, and the surface is smooth and shiny, durable and long-lasting.
Custom Soft Enamel Pins
Custom soft enamel pins have a textured surface that can showcase more details on your pin. They are relatively inexpensive compared to hard enamel pins, but they are not as durable
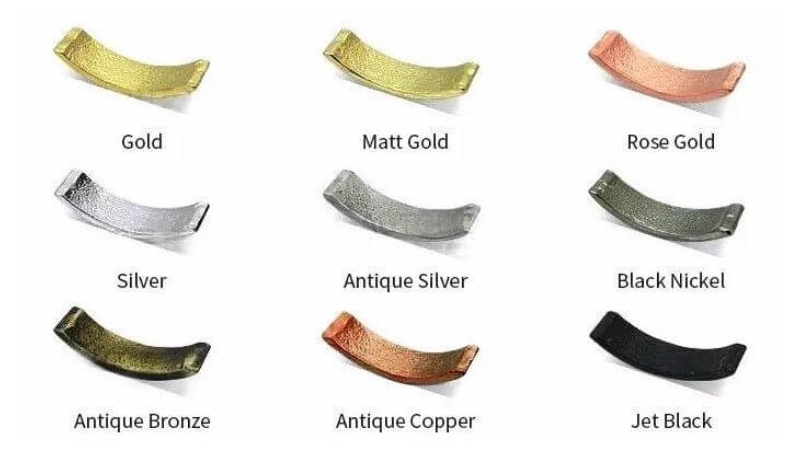
Choose an Electroplating Color
Nickel, brass, and gold are common plating options. If you want black or colored plating, then soft enamel pins are your best choice. This is because soft enamel pins are made by plating first and then coloring, while hard enamel pins are colored after plating, which can damage the enamel.
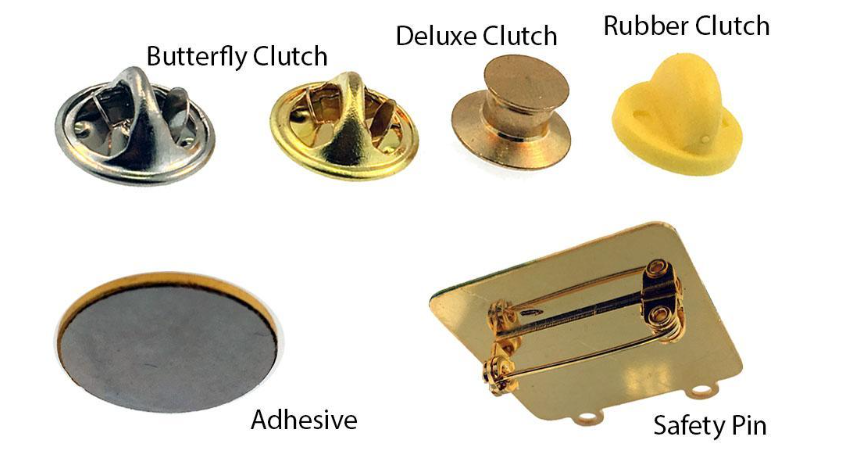
Choose Pin Backs
The back of your pin has a pin post that is used to secure the pin to clothing or objects. As a general rule of thumb, if your pin is larger than one inch, you will need two pin posts to secure it, and if it is larger than 2.5 inches and square, you will need 3-4 pin posts to secure a pin with a specific orientation. The back is usually made of rubber to prevent the pin from slipping off after it is inserted through the clothing. It can also be made with a butterfly clutch, which is a safer and more secure option than a rubber clutch.
Determine Production Quantity
We welcome your inquiry whether it is a low minimum order quantity or a large order. The more you order, the lower your cost will be. However, please note that if your pins have multiple pin posts, be sure to include the cost of the pin backs.
Packaging Options
We can customize different packaging for you according to your different needs. Some retailers choose to package pins with backing cards and OPP bags.
Select an Enamel Pin Factory for Your Project
Once you have your design artwork and finalized the details of your pins, you can contact us and tell us the material, size, quantity, and the number of pin back attachments you want. Our team with years of experience will provide you with the best service.
How to Make Custom Enamel Pins
(Hard Enamel Pins)
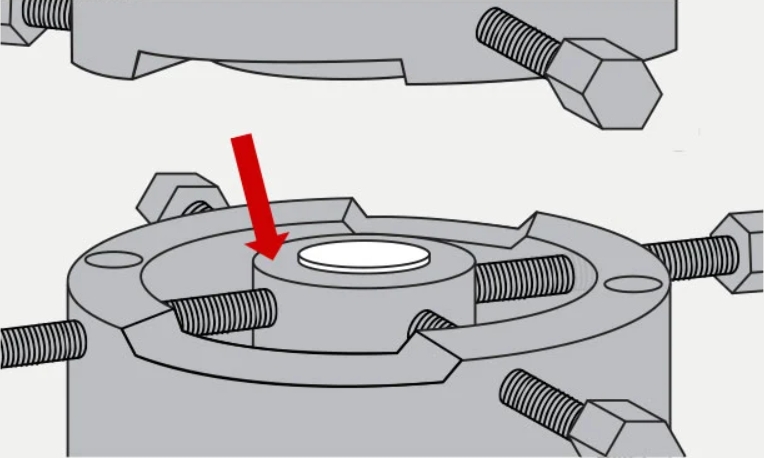
Create a Stamping Mold
The factory will create a 3D model based on your drawings. This step will incur a mold fee, which is unavoidable. A piece of zinc metal is used as the material and fixed on the engraving machine. The computer will remove the excess metal according to the program. The required time depends on the complexity of your pattern. Simple patterns only take a few hours, while complex patterns take a few days. After the mold is made, it needs to be baked in a high-temperature oven and finally cooled in oil. The mold is then considered complete.
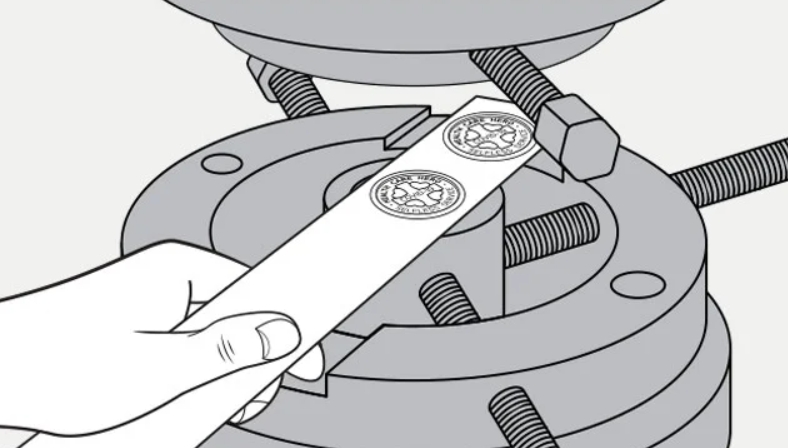
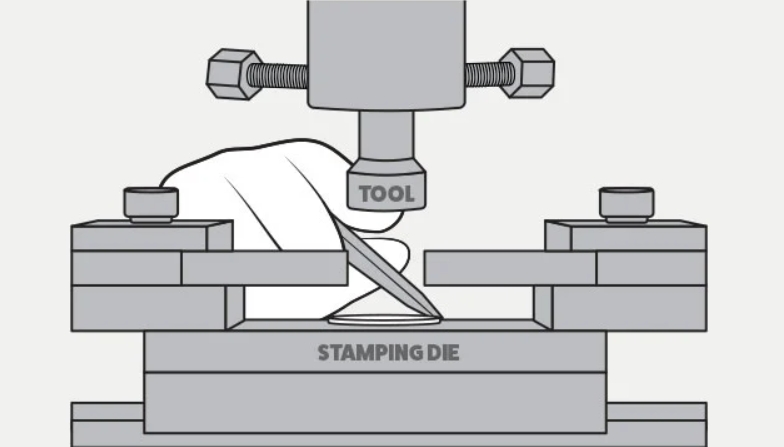
Stamping
Factory operators will place your stamping die on the stamping machine, then feed a metal strip into the top of the die. Once the stamping machine applies pressure to the metal, your designed pattern will be embossed onto the metal.
Trimming
After stamping, the metal strip is fed into a trimming press to remove the excess material, giving your pin its initial shape.
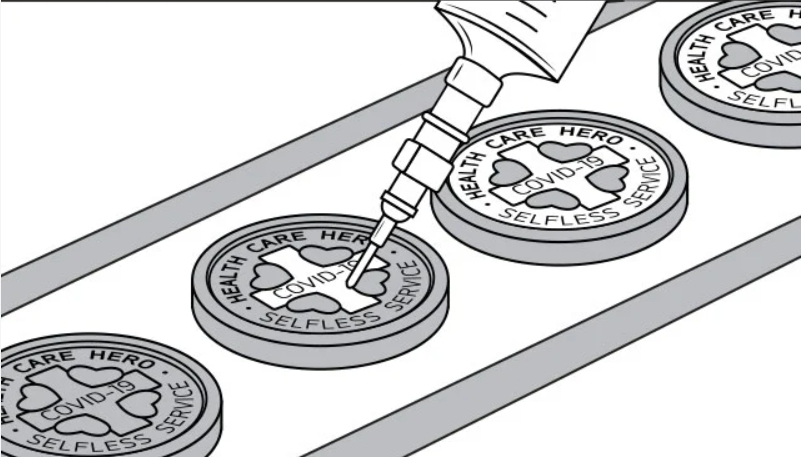
Coloring
Each color can only be applied once. After each color is applied, it needs to be baked in an oven for two hours to ensure that it is dry and will not mix with other colors. Usually, hand painting or machine painting is used. The color of hard enamel is flush with the metal frame, while the soft enamel paint is thinner, forming a concave texture. After each color is baked, the factory will apply a layer of epoxy resin on your pin to prevent your pin from being scratched or faded.
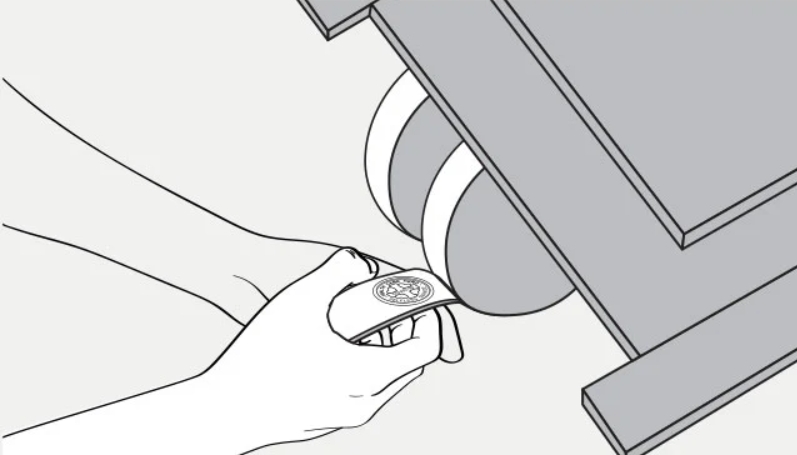
Buffing
Hard enamel pins require multiple polishing steps until the enamel paint is flush with the metal edges. Our craftsmen hand-polish each pin, demonstrating our responsibility to our customers and our commitment to quality.
Electroplating
To meet your color requirements for pins, electroplating can be used to obtain a surface coating of other metals, commonly available in finishes such as bright gold, bright silver, and antique copper.
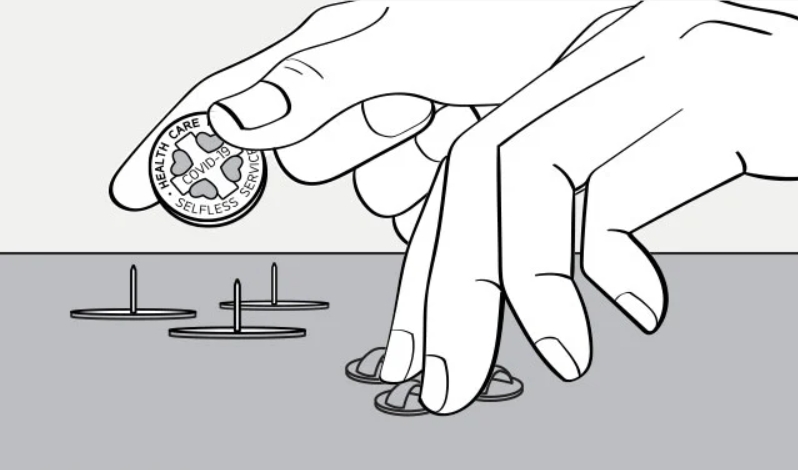
Installing the Back Post
Pins need to be inserted into fabric and secured with a pin attachment to ensure that they are secure and not easy to fall off. Therefore, this step requires using a special spot welder to weld the post to the back of the pin and install an attachment to prevent the pin from falling off.
Quality Inspection
The factory staff will carefully check the condition of each pin to ensure that there are no quality problems, and then put them into OPP bags and deliver them to customers.
Packaging Your Enamel Pins
Products that have passed the quality inspection can be packaged. We can package the products according to customer requirements. OPP bags are commonly used, and additional packaging such as paper cards and plastic boxes can also be provided.
Contact Us: Customize Your Exclusive Enamel Pins
After reading this article, you should have a good understanding of how to create your own unique enamel pins.If you need any help or want to turn your ideas into reality, please visit our website and contact us. We welcome your inquiries regardless of whether you decide to work with us.